|
How many of you knew this
was coming? I knew something was going to be kitbashed when I
went out on Sunday (12 May 02) to purchase more "stuff" to build things with :P
As soon as I posted my
Mini-Scourge link on ATT, I started to receive some feedback. Then
someone had to mention getting Sidecutter's
Sword of Fury.
I've been thinking about getting one someday...and probably will soon,
but when I read the post I said to myself, "I should make a sword". My work began.
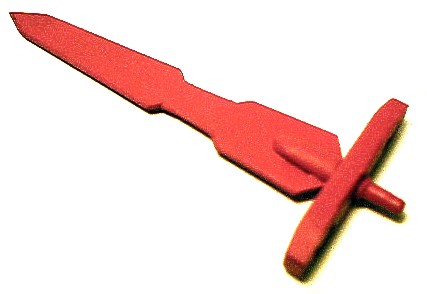
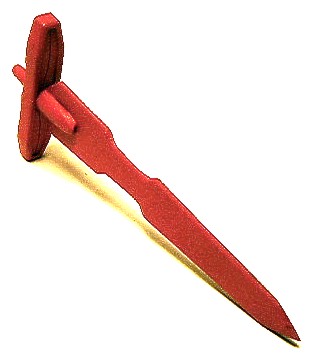
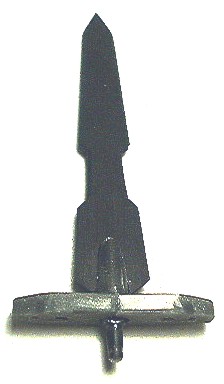
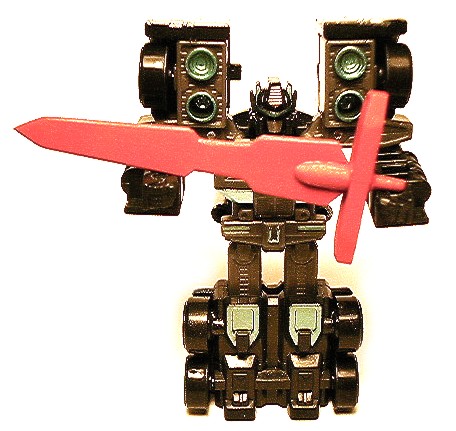
The first thing I did was
use Black Convoy's sword as a reference. I drew an outline of the blade & hilt and looked for some plastic. There was the other
half of 3�-inch floppy disc which I previously used that would work.
I used my X-Acto knife and scored the plastic using my sketch as an
outline. Once I was satisfied with the marks, I finished cutting
out the blade from the floppy disc. I cut out the notches on the
sides and then sanded down the blade.
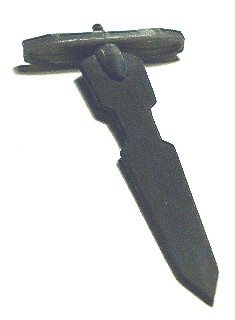
Now I had to figure out
what I was going to use as the hilt. The first thing I saw was the
smoke stacks on Scourge which was scraps from the first kitbash. I
pulled out the Dremel and began to remove one. The tip of the
stack would be small enough as the handle and the thicker end (which was
hallow) would connect to the blade. I sanded the smoke stack so
that it was cylindrical then started to cut the hallow end, making a
slit for the blade. I even had to notch out a square section at
the base of the blade so that it was a snug fit.
I sanded down the end of
the hilt that connects to the base of the blade, removing the
square-ness by rounding the tip. When everything fit nicely, I
super-glued the blade to the hilt.
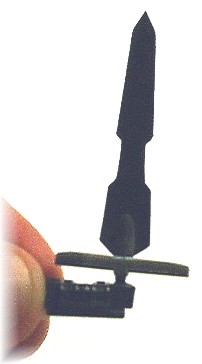
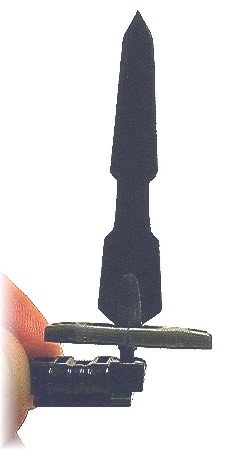
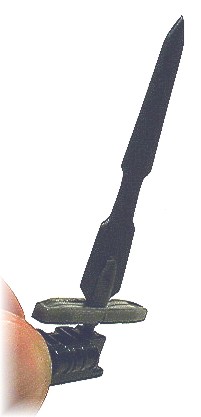
Instead of using the slit
on Scourge's shoulder as a place to mount the sword as Dave did, I
decided to drill a 1/8-inch diameter hole in his fist. I used the
scrap Scourge to test this out. I slid the hilt into his fist
which looked perfect.
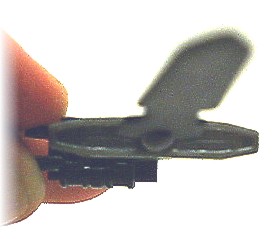
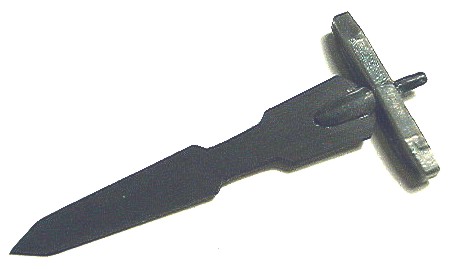
The next thing I needed
to figure out was what to use as the guard above the handle. I
turned again to the Scourge scraps. I decided to use the Grey
shoulder parts which connected to Scourge's arms. I removed the
pins that connected the shoulder and removed the upper part of the
shoulder piece. I had to do a lot of sanding in order to get the
lower parts just right, but once I finished, you could see the guard
coming together. I cut the ends of the shoulder piece where the
pin holes used to be and spliced the parts together. I again
super-glue the parts then drilled out the center hole a little wider so
that the hilt would slide right in. Some more glue was added and
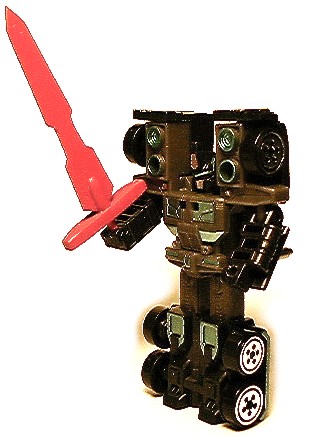
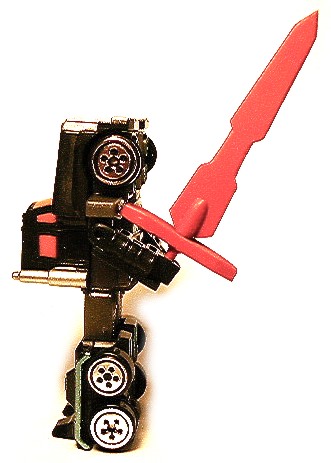
the results on shown in the photos on the right.
Now I need to find some
paint...fluorescent Pink or Red? We shall see.
** Select the
number under each photo for a large view **
|

;)
;)
;)
;)
;)
;)
;)
;)
;)
;)
;)
;)
;)
;)
;)