Mini-SCOURGE TRAILER
Robots in Disguise Kitbash


Front


Back

** Select links above for larger photos **

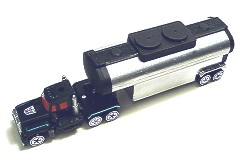
When I first saw Dave Van Domelen’s kitbash page that featured mini-Scourge's trailer, I knew I had to try it myself.  I kept putting it off because I just didn’t have the time nor found the right 
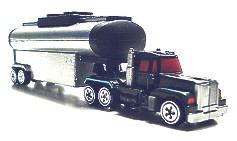
trailer.  When I was searching for new releases of Transformers Robots in Disguise at Wal-Mart, I noticed a Highway Hauler by Maisto with the perfect dimensions and proceeded to checkout counter.  The Highway Hauler retails for $2.47 at Wal-Mart.

I already had a Testors modeling set for beginners (paint, brushes, glue, and X-Acto knife) and a cheap Testors airbrush (1000S Single-Action No.8826) that I had used for painting a GEAR Dendoh model, so I was on my way.

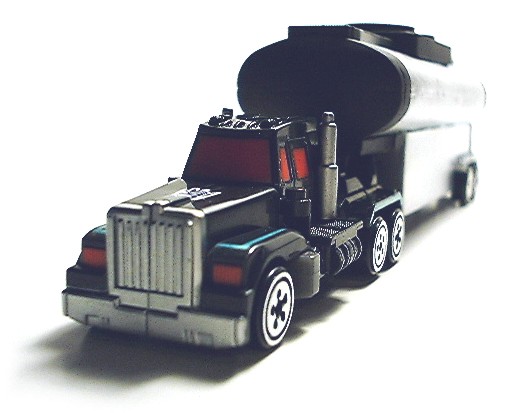
I examined the trailer for sometime and realized that it was too long for Scourge when I compared it to my Black Convoy figure. I knew that I had to do some serious modifications to shorten the length of the trailer, so I made some pencil marks and began cutting the front-end of the trailer. I removed about 1¼ inches from the container, sanded the edges, and then glued the "end" to the main trailer.

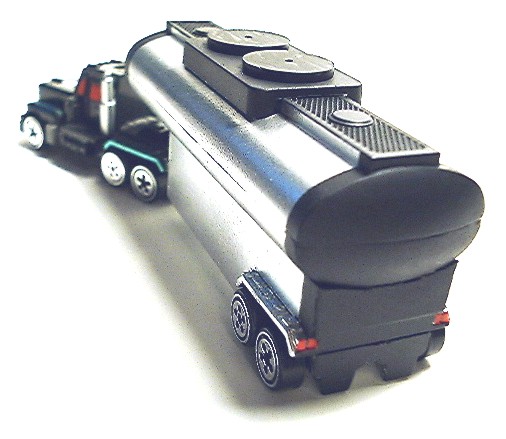
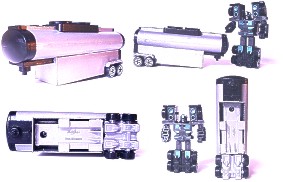
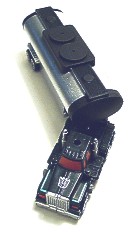
I removed the rear wheels and decided to use the rear chassis of a spare Scourge so that the wheels would match. The first thing I did was remove the screws from Scourge’s cab then kept the legs and rear wheels intact. I put this aside because I needed to figure out how I wanted to connect this to the trailer.


After removing the section of the trailer as well as the wheels, I pulled out the Dremel and sanded down sections of the undercarriage that held the wheels in place.  This part would be used to connect the wheels to the trailer.

I sanded down the top of Scourge’s wheel housing as well as the pelvic region that connected to the legs.  I glued the undercarriage to Scourge’s rear chassis, then to the trailer.

The trailer was starting to take shape.  I had the wheels connected to main container but I needed to find some spare plastic to make up the side panels.  I looked all over and found a 3¼-inch floppy disc that looked like it had enough plastic for the panels.  I took some measurements and cut out 4 sides of the panels. The trailer’s mold had a ladder on one side, and 3 support "studs" on each side, towards the bottom.  I sanded down the ladder but kept half of each "stud" since it would be used as support for the new panels.  The final step was gluing them to the trailer.

I attached the trailer to the back of Scourge to see what it looked like.  The front-end of the trailer was up too high.  I had to sand down the post that would be used to connect to Scourge that looked a lot better.  It’s still a little high if you asked me, but it will do.


** Select links for close-up photos **
1    2    3    4

Now I began to look around for some more plastic to create the discs and base that are on top of the trailer.  I found a rectangular piece that used to be a base for one of my cheap toys.  I cut the ends so that it would straddle the centerpiece of the trailer, then sanded the edges so that it conforms to the curvature of the trailer.

I found a couple of clear plastic discs that would look good on top of the base unit.  These discs are actually used as spacers for my military uniform (behind ribbons).  So if you look closely you’ll notice that there is a hole in the center of each disc.  I glued these discs to the trailer, which was the final step before sanding and painting.

I had some 320-grit sandpaper but I should have used something like 400-grit because the grooves were noticeable.  Once I sanded all the edges, I used some masking tape to cover the wheels.  I pulled out some flat-Black paint and put my airbrush to work.  After a couple of coats, I applied more masking tape to various parts that I wanted to remain Black such as the top, ends, and part of the undercarriage.  I applied Silver paint to the exposed areas and went to town.  Unfortunately, my lack of experience in painting showed.  I obviously didn’t clean the airbrush tip, which is why there were splotches all over the trailer.  Oh well…what can you do?

Once the paint dried, I touched up a couple of over-sprays, applied some Red paint on the taillights and viola!


There are a few things I wish I had on hand to improve my first kitbash:
  1. Compound to fill the gaps—Sculpey?
  2. A better selection of plastic parts
  3. Topcoat to protect/seal the paint
  4. Patience!!

Overall, I’m quite satisfied with my first kitbash…any thoughts?
 

Mini-SCOURGE's SWORD OF FURY --->


Send E-Mail to Rik Ruff with any comments
or suggestions to improve this page.